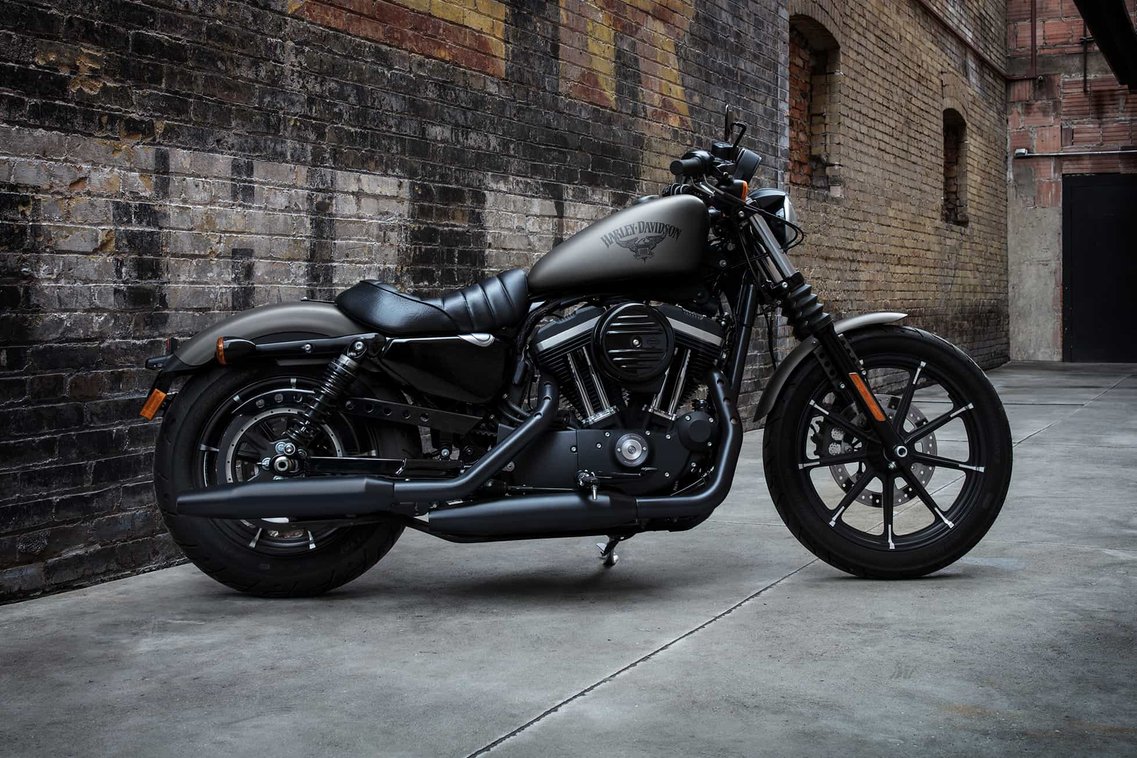
Our chosen fuel tank of choice was the Harley 883 Iron fuel tank.

Things you will need:
Aluminium Sheet
Camera
Laser cutter
Mallets
English Wheel
Sand bag
Planishing Hammer
Dolly set
English Wheel
Sand bag
Planishing Hammer
Dolly set
Sand paper (optional)
Polisher (optional)
Program: Autodesk Recap
Program: Fusion 360
Program: Illustrator
Program: Fusion 360
Program: Illustrator
PHASE 1 - Making the Fuel tank template.
As a multidisciplinary team, we had to work together to come up with ideas on how to progress through with creating a 1:1 scaled model of our chosen Harley 883 Fuel tank.
The members were:
The members were:
Moonjin Kim
Li Chen
Eu Gene Hyun (Me)
Louis Yu Tak Cheung
Iverson Chun Yat Chiu
Yixuan Zhang
Yihui Wang
Wing Yan Chick
Alex Sostres-Roberts
Li Chen
Eu Gene Hyun (Me)
Louis Yu Tak Cheung
Iverson Chun Yat Chiu
Yixuan Zhang
Yihui Wang
Wing Yan Chick
Alex Sostres-Roberts
STEP 1. Our first step was to take multiple photos at different angles of the fuel tank. We ended up taking 40 photos. We had to make sure that the photos were evenly showing the slight changes in curvature as we circled the fuel tank.


STEP 2. Our next step was to collate the images into a program called Recap which produced a 3D model of the fuel tank. We had to insert one dimension, and the rest were automatically generated.


STEP 3. We then exported the '.rcm' type file as a '.obj' file to import into Fusion360. Fusion360 Slicer is a tool which cuts up 3d models and generates templates that could be later lasercutted and assembled into real life 3D models.
Inputs for Fusion360 Slicer:
Sheet size: 800x500 Sheet thickness: 6mm (this is important as it will create the notch widths for the templates to interlock with eachother.)
Model size: (W) 400mm, we put in one dimension which automatically generated the rest of the dimensions.
(H) 209mm & (L) 494.342mm
Construction technique: interlocked slices
Slice distribution: 1st Axis - 15 / 2nd Axis - 15

We cut the model up to get 15x15 horizontal and vertical slices.
STEP 4. Once we got the pdf's of the templates all ready with correct lineweight and colour, we imported it into Illustrator and soon we were ready to laser cut the templates to get the skeletal 1:1 scale model of the fuel tank. We choose to use 6mm thick plywood for the material.


STEP 5. The Slicer automatically inputs numbers on the templates which tells us the steps of putting the templates together. We also needed to use a soft hammer to insert the template within the notches as the spaces were quite tight. The process of assembling the model together took quite a while, but was satisfied with the end result.


PHASE 2 - Dividing the fuel tank.
This phase of the project was done as groups of 3 within the multidisciplinary team. We had to divide the fuel tank in three sections. This was to be completed individually, but each of our parts must come together to fit the 1:1 scale model of fuel tank template.
Our group members were:
Moonjin Kim
Li Chen
Eu Gene Hyun (me)
Our group members were:
Moonjin Kim
Li Chen
Eu Gene Hyun (me)
STEP 1. We then wrap the model again with paper. We had to fold according to the curvature of the template and taped the edges to create a paper skin around the model. We then divided the paper skin into 3 portions and cut each portion out with a knife.
Portions:
1: Left side of the fuel tank - Gene
2: Right side of the fuel tank - Li Chen
3: Top side of the fuel tank overlapping the downwards crease - Moon
4: Back side of the fuel tank - Moon


STEP 2. The next step was to create outlines onto our steel panels


Portions:
1: Left side of the fuel tank - Gene
2: Right side of the fuel tank - Li Chen
3: Top side of the fuel tank overlapping the downwards crease - Moon
4: Back side of the fuel tank - Moon


We realized that the 3rd piece would be easier to cut a 4th piece.
STEP 2. The next step was to create outlines onto our steel panels


STEP 3. Using the guillotine we cut the big aluminium sheet into 3 portions and then used the hand lever shear, cut out the individual pieces.


STEP 1. Looking at my piece of the fuel tank, I could see that there were mainly 6 areas to focus on in order to shape the metal to fit the plywood template. I decided to mark the areas that would need shrinking and expanding.

STEP 2. Using a sandbag and nylon mallet I started off working the edges of the steel piece as I could see that the fuel tank caved inwards. As the curves on the edges are quite subtle, I was quite careful to not create dents too big. After that I started working the largest curve which is the part which connects to the upper piece and the back piece of the fuel tank (shown below).


PHASE 3 - Shaping the metal.
This phase of the project was done individually, according to the template that was created within our multidisciplinary team.
STEP 1. Looking at my piece of the fuel tank, I could see that there were mainly 6 areas to focus on in order to shape the metal to fit the plywood template. I decided to mark the areas that would need shrinking and expanding.

STEP 2. Using a sandbag and nylon mallet I started off working the edges of the steel piece as I could see that the fuel tank caved inwards. As the curves on the edges are quite subtle, I was quite careful to not create dents too big. After that I started working the largest curve which is the part which connects to the upper piece and the back piece of the fuel tank (shown below).

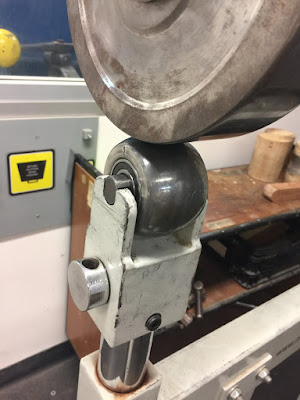
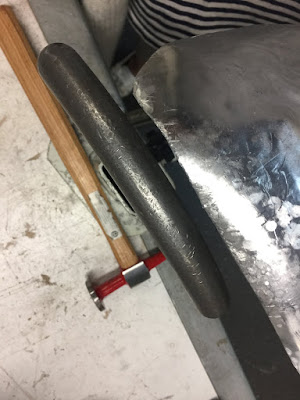
STEP 3. Using the English wheel, I rolled even the dents on the edge which slightly folds over to the top piece of the fuel tank.


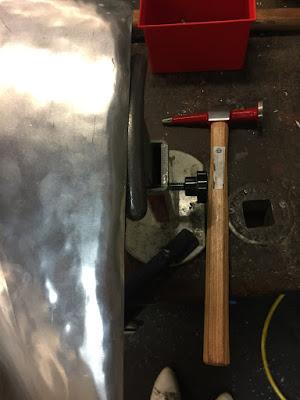
STEP 4. Next was tucking the bottom edge towards the back of the fuel tank. To do this, I used the the round dolly and a planishing hammer.

STEP 5. For the top edge of the same side I used the dome dolly and planishing hammer to curve back the edge.


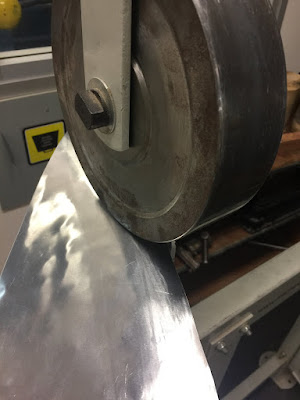
STEP 6. There was a problem with shrinking the top right edge over and so I decided to scrunch it with the metal shrinker and work the edges with the mallet and English wheel to smooth it out.


STEP 7. The curved t-dolly was used to fold over the edges to a greater angle for the top and bottom edges of the metal piece.


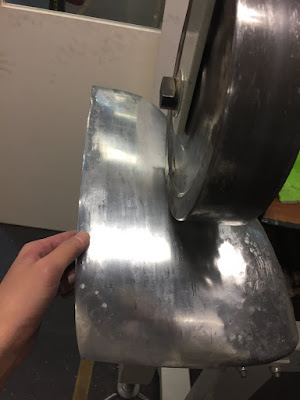
STEP 8. I repeated the above steps until I was satisfied with how my piece fitted the plywood fuel tank template. After I was satisfied with the fit, I used the flattest option of the English wheel to smooth out the dents on my aluminium piece. I needed to be careful as this could also change the shape of my aluminium. I found that if i rotate the upper and underside, it doesn’t change the shape of the metal.

STEP 9. For smoothing out the surface for the curved portions of the metal, I used a rounder wheel for the english wheel. You have to make sure you check back with the template to make sure that the curvature has not changed.

STEP 10. I used the hand lever shear and the metal filer to shape even the edges. The edges may become uneven as a result of shrinking and/or expanding the metal.

STEP 11. That last step when you are happy with the shape is to polish the surface of the metal. We used Silvo metal polish and wipes to create a smooth shine.

RESULTS


My piece:


My piece on template:


My piece together with group:


Comments
Post a Comment